SCOTCAT.COM
your internet guide to all things catfish
| Winter Worms |
by Daphne Layley |
They have a lot of things in their favour:
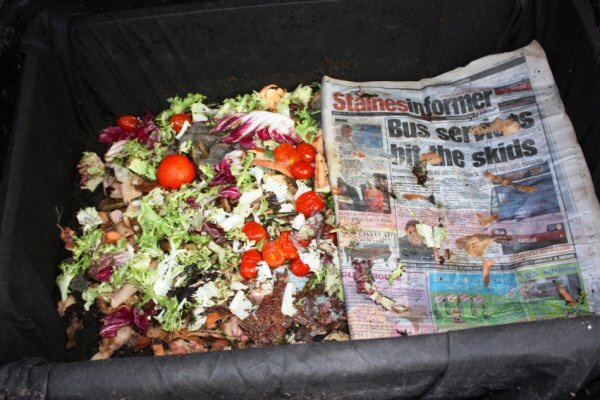
I said ALMOST all year. This winter the whole country has been under several inches – in some cases several feet – of snow. The ground has been frozen solid, and the earthworms had gone down far too deep to get at them even with a pick-axe. However, when the temperature is down to minus 15 degrees centigrade, a two-minute trip with a little pot and a pair of tweezers to a small black box just outside my back door, regularly produces enough earthworms to feed ALL my catfish, and this is how it came about. Initially, I investigated the possibility of buying a proper, custom built wormery, with several different layers, one above the other, but they are quite expensive so I decided to economise and go down the DIY route. My first attempt was a spectacular disaster, because I used an old polystyrene fish box. After it had been operational for about two weeks, I went out to it one day and discovered that a rat had chewed a 3” diameter hole right into it, and it was completely ruined. I decided to stop being quite such a skinflint, and to buy a rat-proof box. A DIY tool catalogue provided the solution, and I ordered a black, plastic 25 gallon water storage tank, complete with snap-on lid. These are really designed for the plumbing trade, and are normally used in lofts. They come in different sizes, and I decided on a middle-sized one, about 75cm long x 60cm wide by 55cm high, at a cost of about £25. A good substitute would be an old, rectangular black-box style pond filter, with the holes blocked up. I then drilled a row of tiny drainage holes, about 5cm apart, all around the sides of the box, approximately 1cm up from the bottom. I also drilled some small holes in the lid for ventilation. The first thing I put in was a 3” layer of coarse gravel and pea shingle. Again, this was to facilitate drainage, and had been kicking around in buckets in the back garden for many years, having been ousted from my aquariums when I replaced my gravel substrate with sand. I then cut 1” thick sheets of polystyrene (old fish poly-boxes work well) and lined inside the vertical sides, to give some insulation in extreme weather conditions. The final thing, before the soil went in, was to line the whole remaining cavity with soft black garden landscape fabric. It was laid on top of the gravel-bed, and draped up and over the polystyrene lining (the corners were a little fiddly) and tucked down between the outer walls of the container and the polystyrene. The idea of the fabric was that it lets liquids drain down through the gravel, and out of the drainage holes, but it’s too fine to let the worms through. The last thing was the worm bedding – I chose a mixture of garden loam and ordinary soil, the latter was sieved to remove any undesirable alien creatures. The mix was added to a depth of about 25cm. Finally – to add the worms! Some were dug up from the garden, and some were obtained from a tackle shop. I wanted to avoid Brandlings if possible, as they exude a disgustingly smelly, yellow fluid when interfered with. I use mainly two species, Lumbricus rubellus, the small Red Worm, which gets to between 6cm and 14cm and, primarily, Lumbricus terrestris, which is known by several common names - Lob Worm, Common Earthworm, Dew Worm and Night Crawler. This species gets to between 10cm and 30cm, and three or four big ones make a good mouthful for a medium to large catfish. The worms were spread out on the surface of the soil, and covered with a 1” layer of the same soil that I had kept aside. In preparation for this day, I had been saving all my vegetable peelings, which were spread out on top and the whole surface was then covered with a layer of newspaper. The whole thing was then sprinkled lightly with rain water until the newspaper was quite damp.
Vegetable peelings and damp newspaper
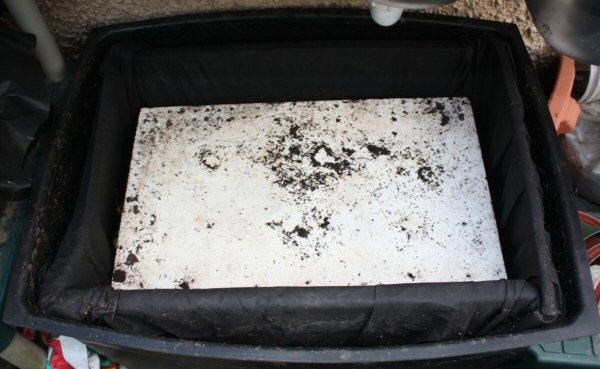
A sheet of polystyrene cut slightly smaller than the surface area was then laid over the newspaper
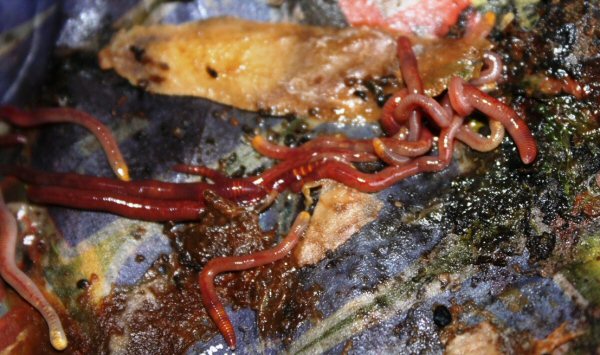
A sheet of polystyrene cut slightly smaller than the surface area was then laid over the newspaper and then the lid was put on to keep it dark and the box was positioned within easy access, just outside my back door and round to one side, up against the house wall to give it some shelter. After a few days I opened the lid and lifted up the damp newspaper. The food was mostly gone, so I added some more. Some of the newspaper appeared to have been eaten as well. The worms were very obvious, although they quickly disappeared downwards once the newspaper was lifted and their quarters were flooded with daylight.
Breeding earthworms
Small versions of their parents can be seen
With regard to food, worms don’t like anything that smells of garlic, onions or leeks, nor do they like citrus fruits which make the soil too acid. But they really do love root vegetable peelings and I save all peelings of potato, carrot, parsnip, turnip & swede and they will also eat tomatoes, greens – sprout, cabbage, courgette and broccoli trimmings. They have to have a certain amount of roughage in their diet, and they enjoy crushed egg shells, paper shreddings (not plasticised paper, of course), and paper-mache egg boxes, which should be dampened and torn up into bits. I should add that I use rain water because our tap water is heavily chlorinated, and the worms don’t like it. They also don’t like to be too wet, or too dry – just slightly damp. It helps if you turn over the soil every few weeks with a hand fork, to aerate and oxygenate it. All this happened three years ago. Since that time I’ve never been without a supply of earthworms, summer or winter. The last two winters have seen temperatures similar to the arctic, and the ground has been frozen as hard as concrete, but the worms have always been within easy reach and I consider that my project was well worth the effort and the small financial outlay.
Daphne Layley Photographs © Graham Layley Sources:
|


If you would like to contribute an article, please e-mail me. You will of course be credited for your work.
If you would like to donate any denomination of money to the site just click the above link button. All proceeds will go to running the site and hopefully to keep it going for a few years yet.
Print or e-mail this article below
